Charging supercapacitors with small solar cells
Harvesting solar energy for low power applications using small photovoltaic cells and supercapacitors as a buffer.
The problem
Imagine small handheld devices and IoT applications powered by the sunlight; no need to recharge or replace batteries; theoretically infinite lifespan and no maintenance. It would be great to include small photovoltaic cells in your project and forget about charging it!
The problem here is that the power output of small solar panels is typically in the range of milliwatts and is highly variable depending on the lighting conditions. These limitations prevent the direct use of photovoltaic panels and point out the necessity to store the harvested solar energy.
The storage can be aimed at retaining the energy for a later stage or to accumulate it to meet the load’s peak power requirements.
The available options for the storage include traditional batteries like NiMh or LiPo but also supercapacitors.
Batteries have large capacitance and retain the charge for long periods. However, they usually need dedicated circuits for charging and the discharge needs to be controlled. They usually deteriorates over time and may need to be replaced at some point.
Supercapacitors, on the other hand, are more durable, can be easily charged and discharged, and don’t usually explode or catch on fire1.
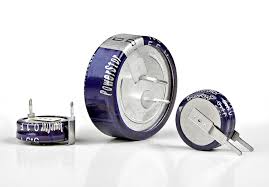
Another big difference is the energy density: supercapacitors are usually bulky and can’t compete with batteries on the amount of energy stored per unit of volume as they can provide 100 times more energy than supercapacitors of same size2.
Supercapacitors properties make them useful for low power applications that require power delivered in short bursts.
An example is a remote sensor transmitting the data at intervals while being switched off the rest of the time. In between the activity periods, the small energy from the solar panels is accumulated into the supercapacitors.
What can be powered with supercapacitors
The energy stored in a supercapacitor can be estimated using the following formula3:
\[E = \frac{1}{2}C{V}^2\]Here, \(C\) is the capacitance in Farads and \(V\) the voltage. It’s unlikely you can use the energy until the capacitor is fully discharged. So the usable energy is more likely to be the difference between the initial voltage and the voltage at which the load stops working:
\[E = \frac{1}{2}C({V_f}^2-{V_i}^2)\]For example, some microcontrollers brown-out at 1.8V. With a voltage range of 3V to 1.8V, a supercapacitor of 1 Farad (it’s a pretty big one) can supply approximately 6J.
The current drawn by an ATtiny85 in active state running at 8MHz and 3.3V is about 2.5mA. This means a power consumptions of about 8mW.
For a rough estimation, assuming a constant current is drawn, the microcontroller can operate for around 12 minutes. Reality will be far from this but it gives an idea of the usability and may help with sizing the circuit components.
How to use supercapacitors?
The simplest circuit
The simplest solar-powered circuit to charge a supercapacitor is made by just connecting the capacitor to the solar panels. The only other important component is a diode to stop the supercapacitor from discharging back into the solar panels. The diode should have a low forward voltage drop like a Schottky diode.
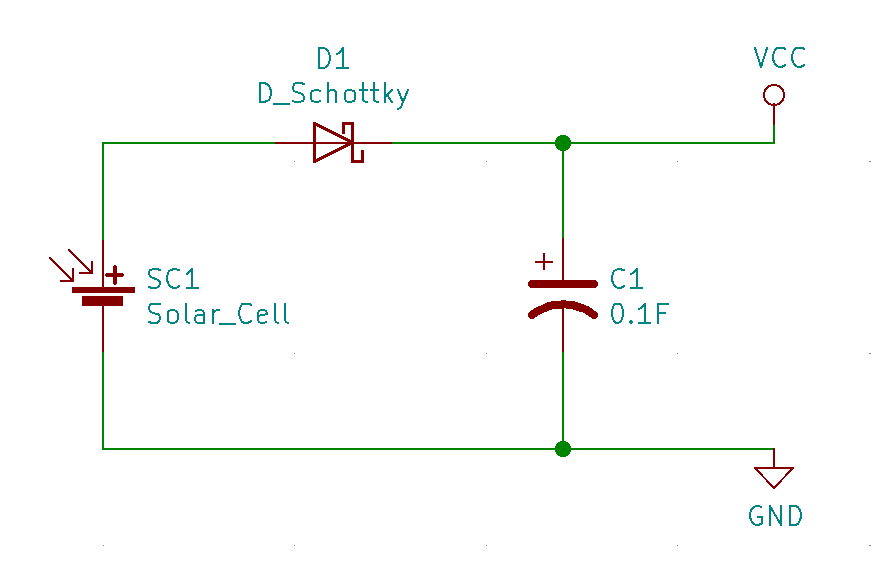
Connected to the capacitor there is a load that will use it’s charge when needed.
A slightly more elaborate circuit
If the photovoltaic cells are small due to design constraints, their maximum voltage may be too low to charge the capacitor at usable levels. So there must be a way to increase the supercapacitor voltage. Trying to improve the previous very basic circuit, we can add a boost converter between the solar panel and the supercapacitor. For this application, the step-up IC should have a low start-up voltage. A good example is the MCP1640 that has a start-up voltage of 0.7V and an operating voltage of just 0.5V.
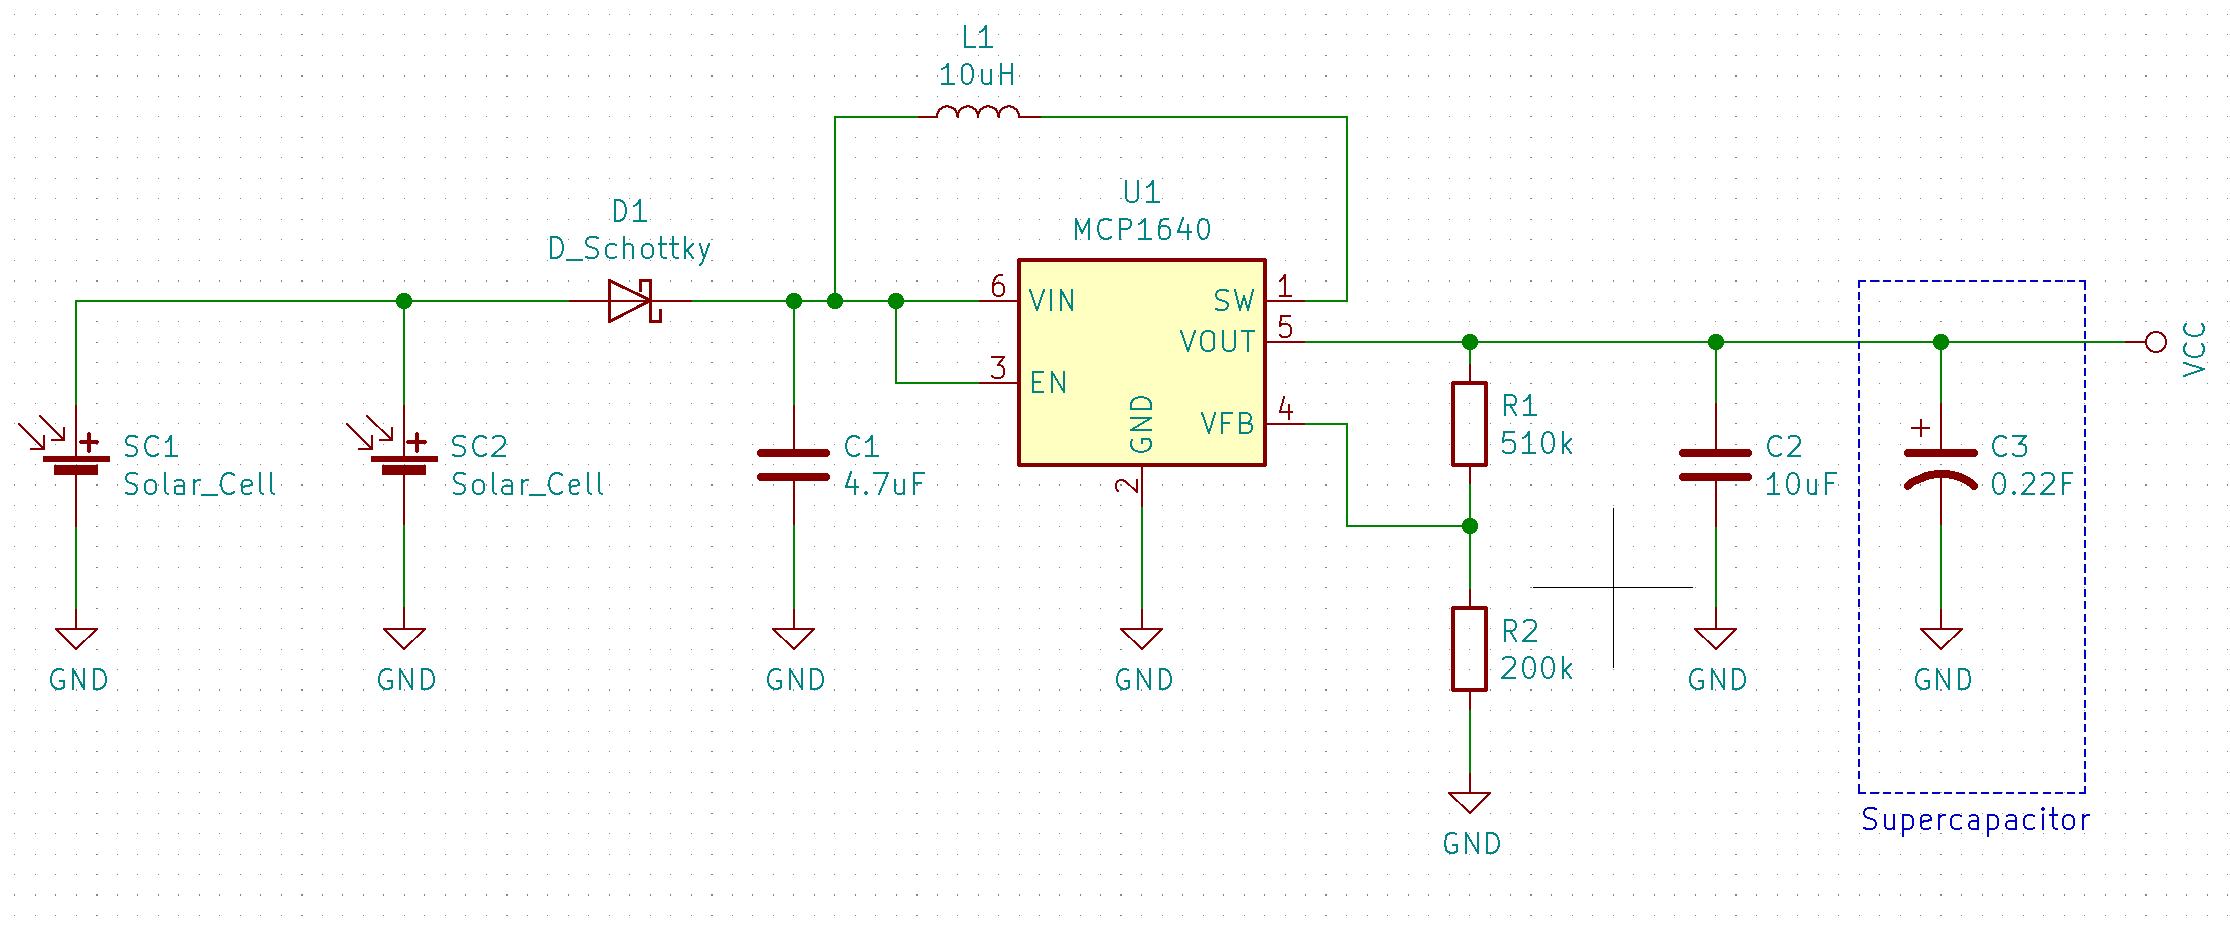
The output of the boost converter can be adjusted to 5.5V that is a usual maximum voltage rating for supercapacitors.
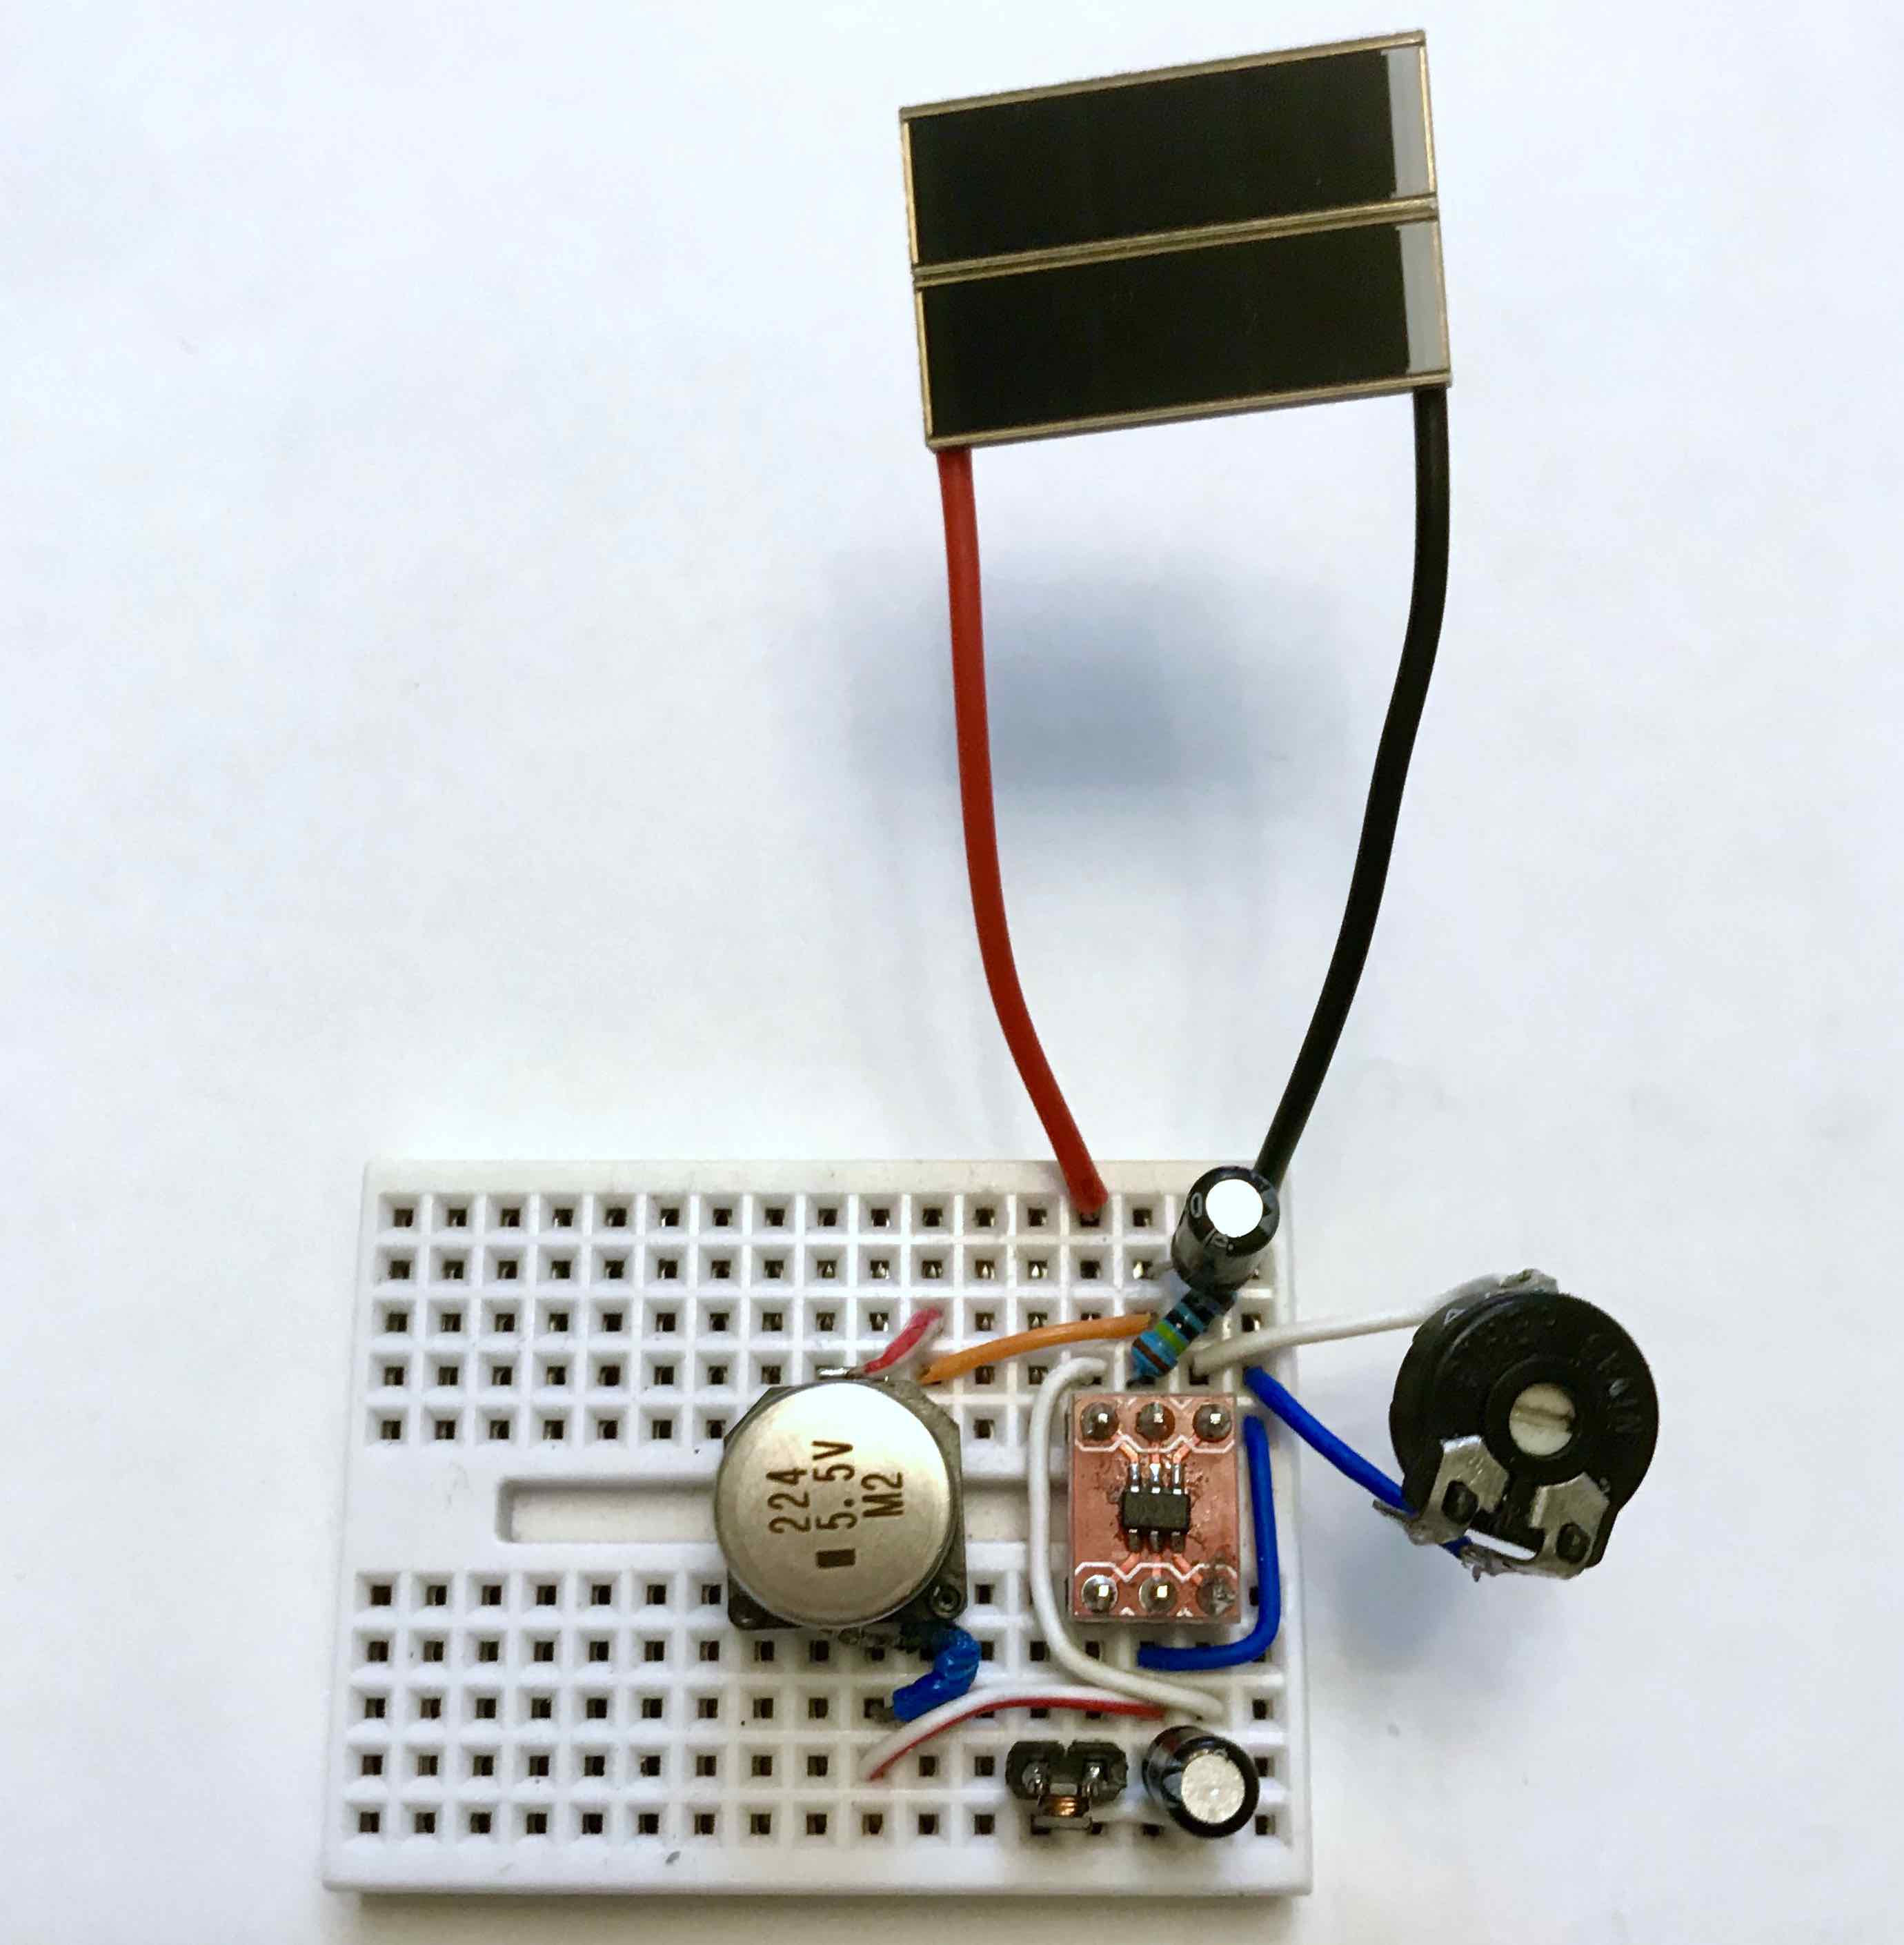 Circuit prototype using two IXOLAR KXOB25-04X3F in parallel and a supercapacitor of 0.22F
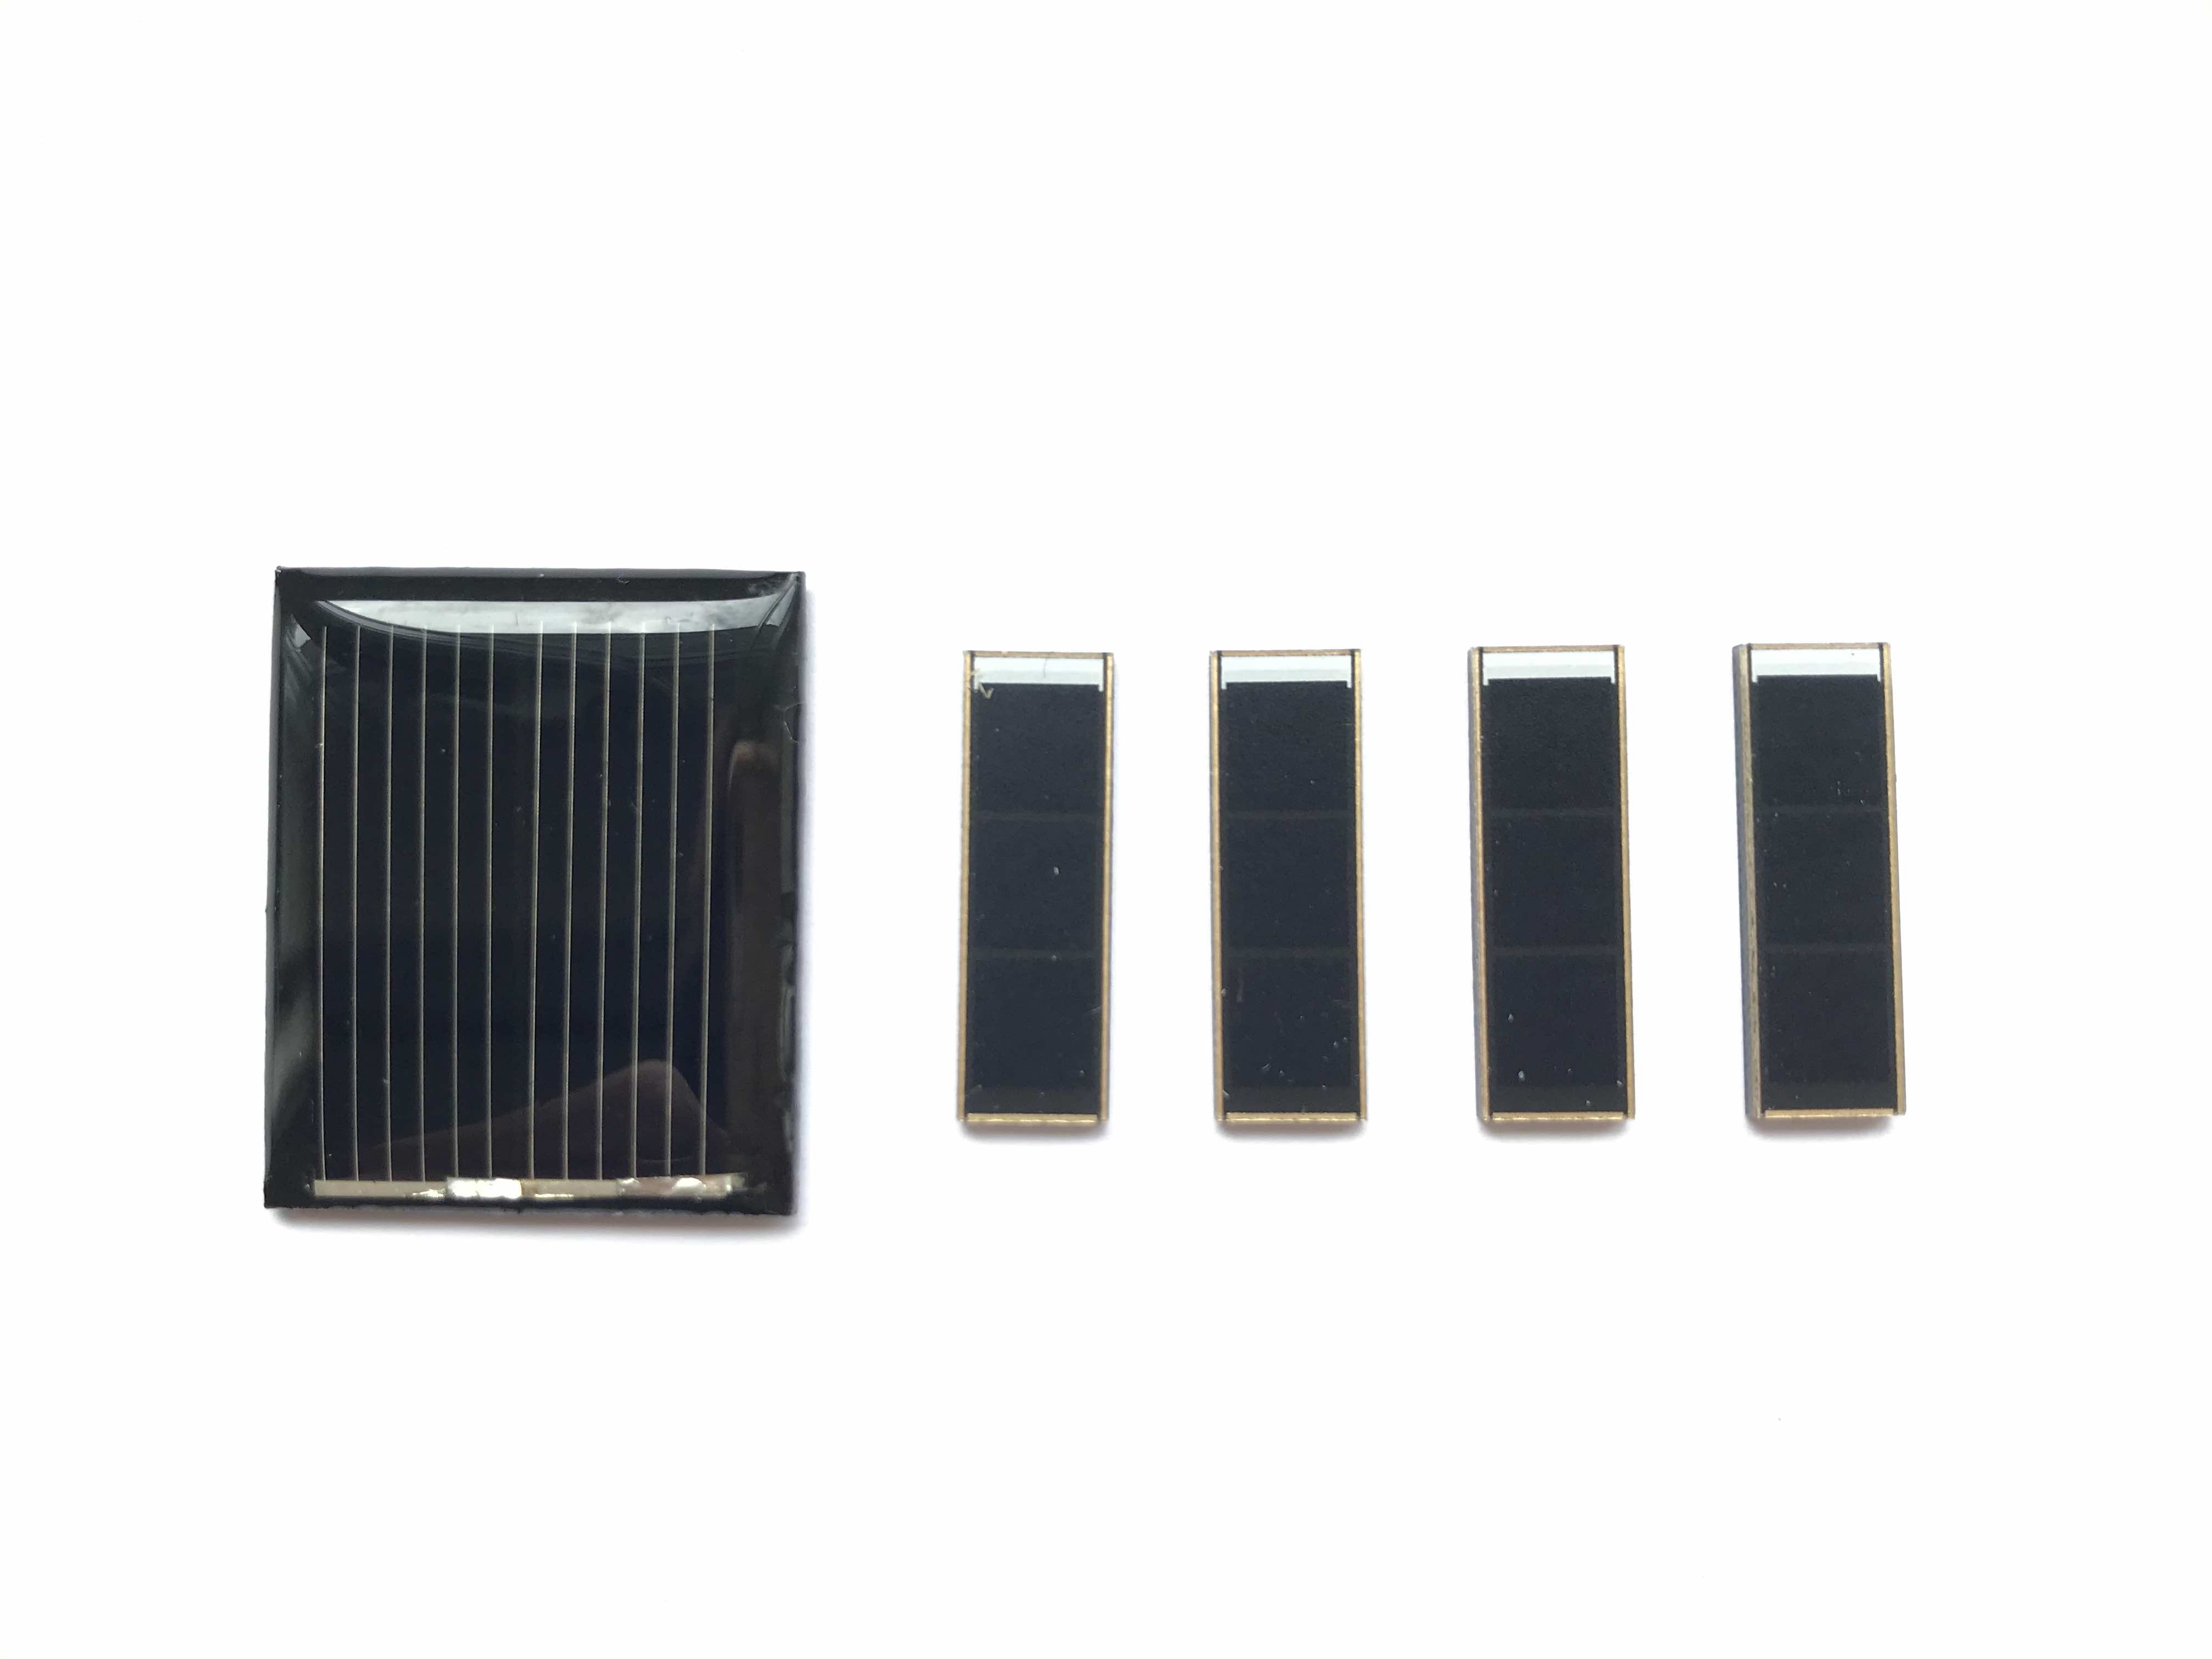
I tested this circuit with two IXOLAR KXOB25-04X3F cells in parallel and also a PV cell of size 25x30mm bought from a well known Chinese online shop. This is supposed to have an open-circuit voltage of 1V and a short circuit current of 80mA.
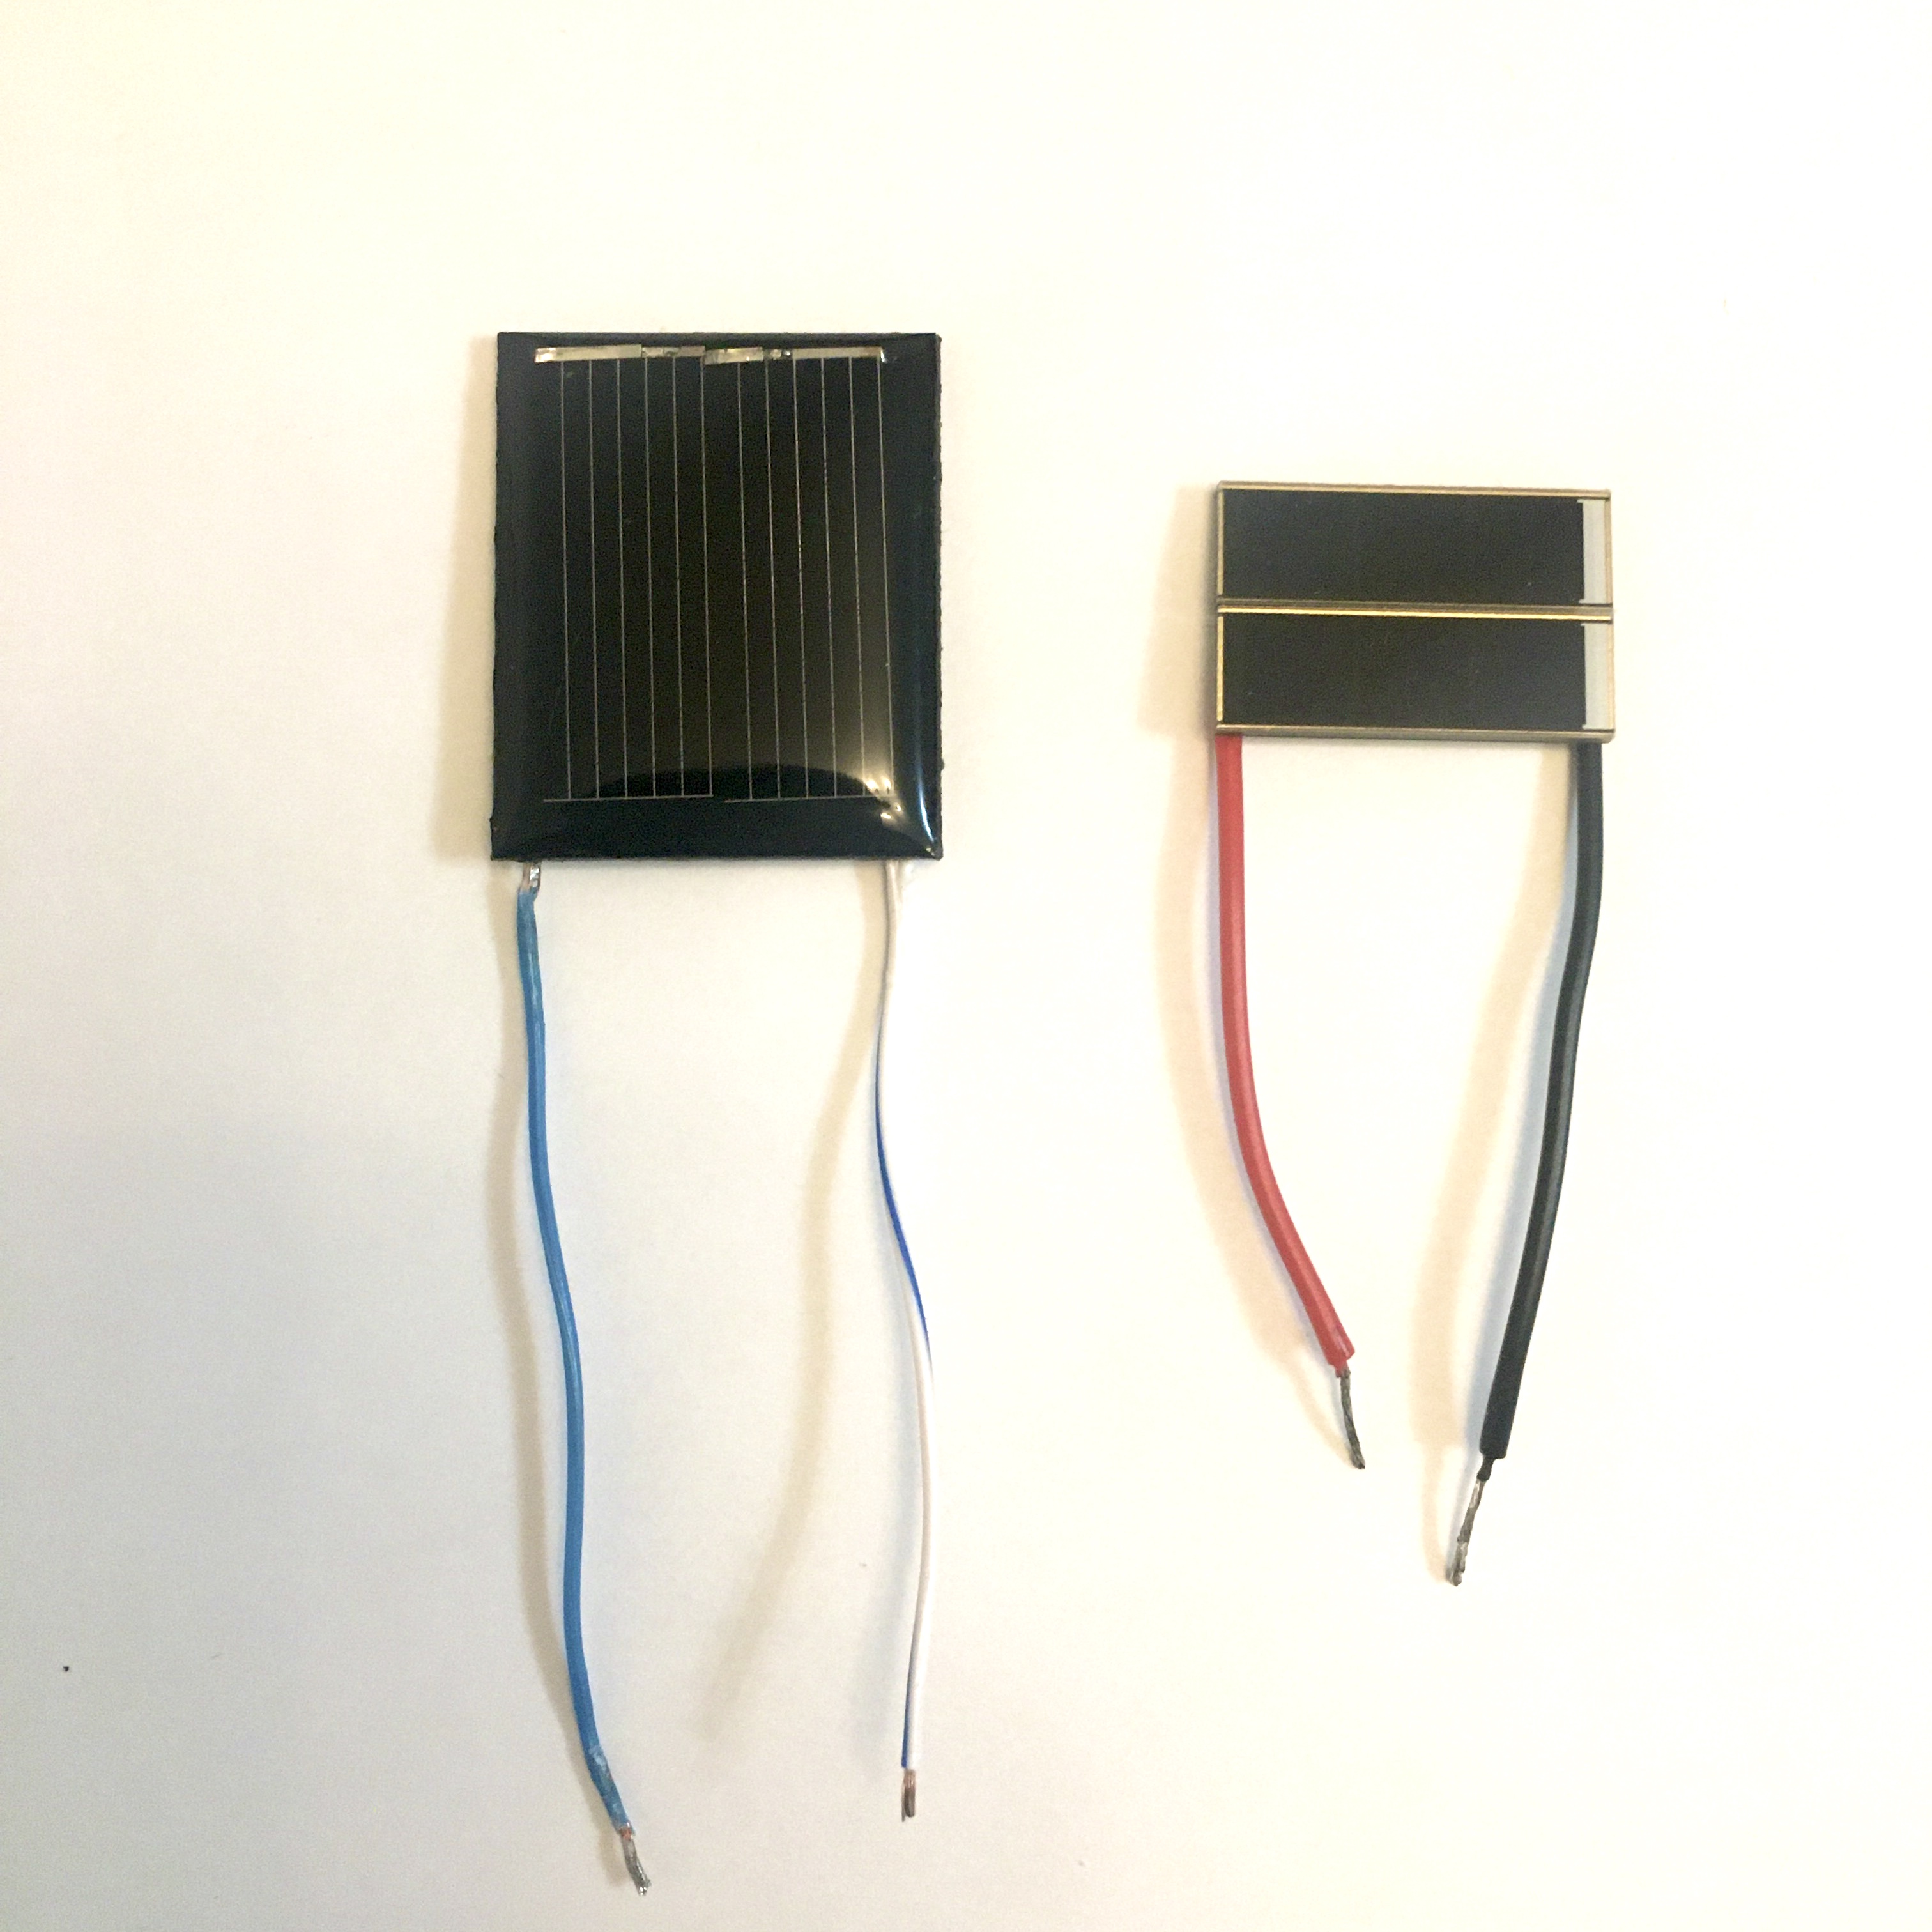
The single PV cell from China perform slightly better with a surface ca. 50% larger. With this, the circuit can charge the 0.22F capacitor from 0 to 3.5V in about two minutes with direct sunlight 4. Once the capacitor has been charged for the first time, its voltage won’t drop again below 1V as the load will probably stop working earlier. This means that the boost converter will be already active with the output voltage in regulation and the time to recharge the supercapacitor will be much lower. Three IXOLAR cells in parallel would yield similar results. The two IXOLAR cells are just enough to get the 0.7V required for the MCP1640 start-up and work only under strong direct sunlight.
Obviously the larger is the solar panel, the better the result. My intention was to understand the minimum size required to power small applications.
Energy harvesting ICs
The circuits may be more complicated than the ones above. They may have multiple capacitors. In this case, you may need a balance charger. Sometimes an overvoltage circuit is required to protect the capacitors.
There are also many ICs specifically intended for energy harvesting applications. These can work with very low input voltages and have very high efficiency. This is a selection of them:
- Texas Instruments TPS61201
- STMicroelectronics SPV1040
- Analog Devices Inc. LTC3105EMS
- Texas Instruments BQ25570RGRT
- Maxim MAX17710
These should be able to vastly improve the performance of the charger working also in lower light conditions. The drawback in using these ICs it’s the cost 5 and sometimes the complexity of the circuit requiring several external components.
Conclusions
This is my very first approach to using PV cells to power small applications. The goal was primarily to explore the possibility of powering embedded systems with solar energy, something I wasn’t sure about. It’s clear that it can be done cheaply and with simple circuits. The very small solar cells I used are enough to power MCUs, RF applications and even small displays (more about this in another post).
From here, there is room for several improvements aimed at increasing the efficiency and robustness of the system. My to-do list already include testing the TPS61201 IC.