ATtiny10 Programming with Platformio and Terminal
The ATtiny10 is an intriguing little device with plenty of capabilities. It’s size pushes your creativity but first, it needs to be programmed. This can get a little tricky but here I suggest two easy ways to get started.
A very tiny microcontroller
The Atmel ATtiny101 is a tiny AVR microcontroller with a 6 pin SOT23 package that despite the size offers very interesting features. It has 1kb of flash memory, 32 bytes of RAM, a 16bit Timer, 8bit ADC, watchdog and the list doesn’t end here. Needless saying that you can get some real fun with this mix of size and specs supported by some creativity 2.
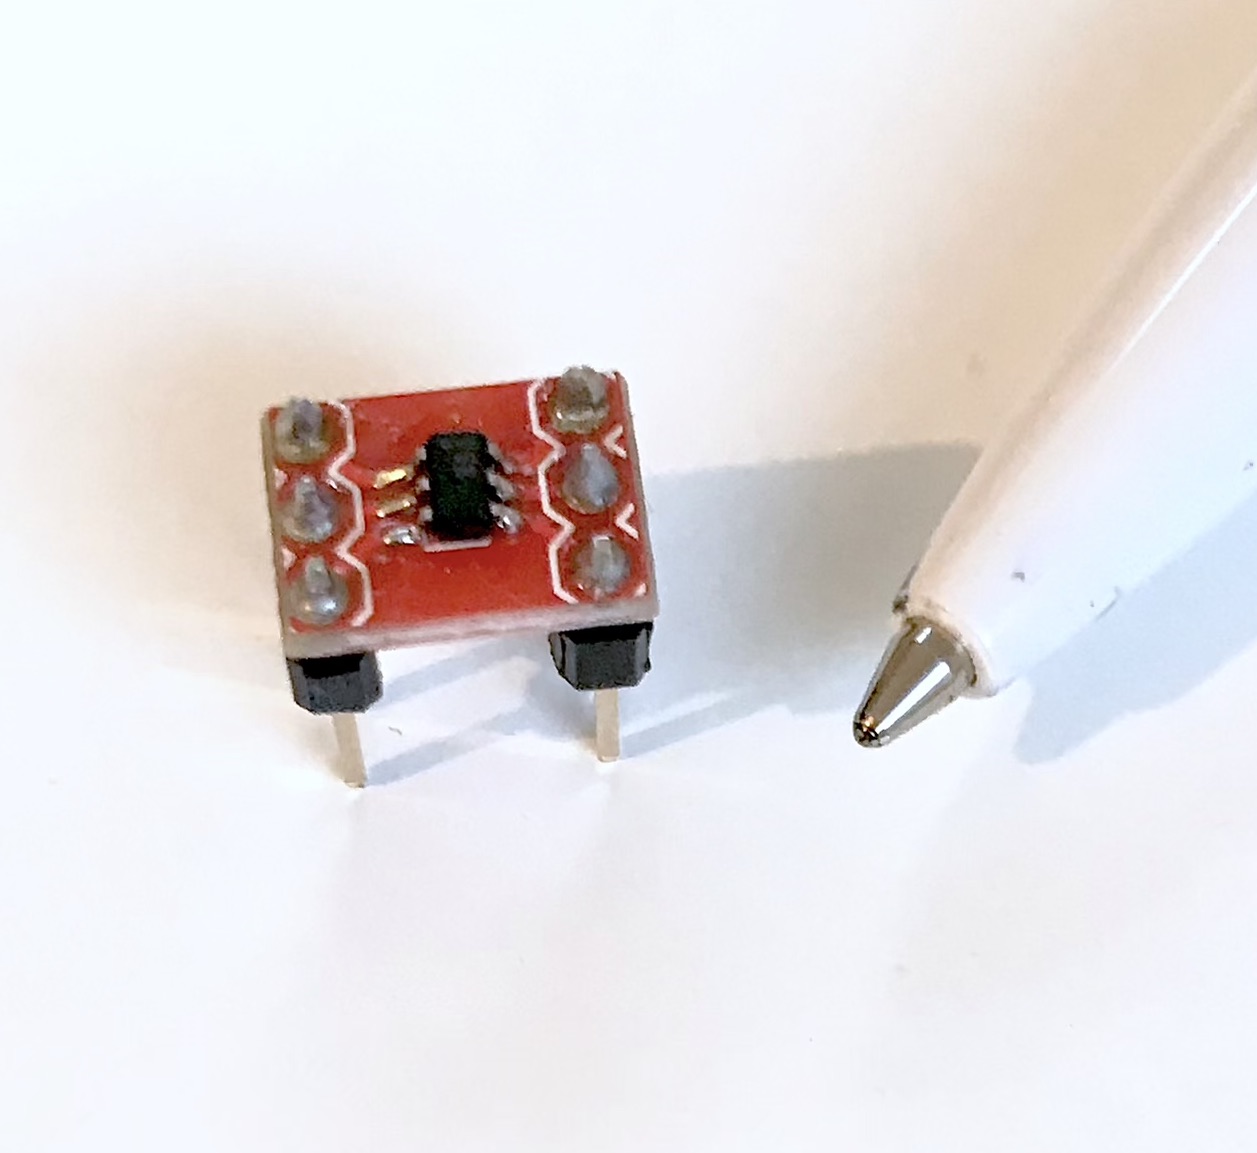 - An ATtiny10 on a breakout board-
So at this point, you already placed your order but you haven’t considered how to get the code inside this little thing. This is indeed a head-scratching issue: you can’t get the code inside this little thing plugging in the USB cable like an Arduino. Instead, what’s needed is an interface called TPI (Tiny Programming Interface). But don’t worry, following the notes below you’ll be able to program the ATtiny10 in two different ways!
The Platformio way
Platformio is an open-source, cross-platform IDE for embedded systems. It supports a lot of boards and frameworks (including Arduino, yes) and is available as an extension for Visual Studio Code which is a big upside compared to the crappy Arduino IDE (I admire the Arduino project but the IDE it’s not a piece of art). I discovered Platformio looking for a way to get around the massive limitations of Arduino IDE that started soon to feel too tight for my projects and my need of control over settings. This great IDE offers different levels of usage: if you want to use just the basic features (using it the same way as Arduino IDE, for example) you can be up and running in few clicks but you also have large flexibility on the project file structure and on the compiling and uploading processes. I must say it takes a while to get familiar with the configuration files but it will pay off quickly giving you all the control over your project. All this is missing in the ArduinoIDE (as of February 2020) and may be included shortly in the new Arduino PRO IDE but for the moment Platformio is my standard choice.
Programming the ATtiny10/9/5 3 family with Platformio is not (yet) an out of the box feature but can be easily implemented. Follow the description below and in 10 minutes you’ll be ready.
1. Create a new board
If you just installed Platformio you will need to install the Atmel AVR platform. That’s easy: go to Platforms icon on the left-hand side, in the search input type Atmel AVR and install it.
Platformio will need to know what environment your project is made for. When creating a new project you will be asked to select the board (i.e. Atmega328) and the framework (i.e. Arduino). This is needed to set-up things like compilation and upload options, available memory space or include files.
The ATtiny10 will not be available in the list so we need to create a custom board.
To do this go to the Platformio folder (on Mac is under /Users/[your username]/.platformio but remember the folder is hidden and you need to press Command+Shift+. to show it).
Once there create a new folder an name it boards.
In this new folder create a JSON file named attiny10.json with the following content:
{
  "build": {
    "f_cpu": "1000000L",
    "mcu": "attiny10"
  },
  "name": "ATtiny10",
  "upload": {
    "maximum_ram_size": 32,
    "maximum_size": 1024,
    "protocol": "usbasp"
  },
  "url": "http://www.atmel.com/devices/ATTINY10.aspx",
  "vendor": "Atmel"
}
Save and close it. Now Platformio will show the ATtiny10 in the boards list.
2. Start a new project
From the Platformio Home page in VisualStudio Code click on New Project. Then insert the project name and from the board drop-down list select the ATtiny10.
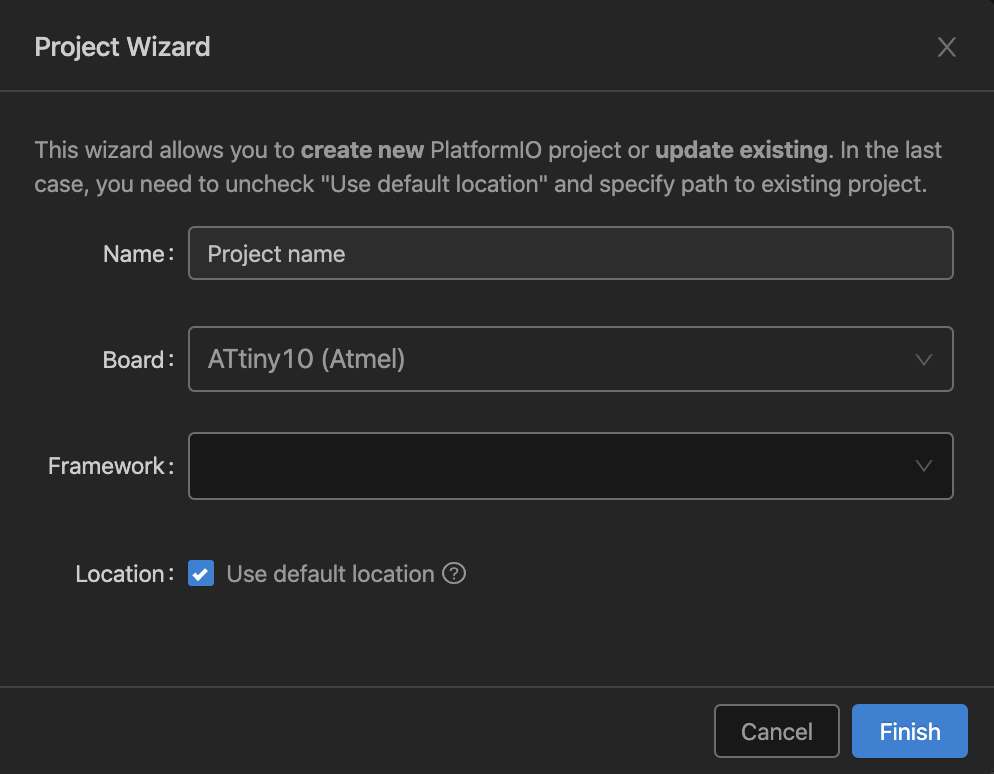 The Platformio New Project window
3. Do some code
Under the src folder from the Platformio file explorer panel create a new main.cpp file. Fill it with the following code:
#include <avr/io.h>

int main () {
  DDRB = 1;                    // PB0 as an output
  TCCR0A = 1<<COM0A0;          // Toggle OC0A
  TCCR0B = 1<<WGM02 | 3<<CS00; // CTC mode and set prescaler to 64
  OCR0A = 3905;                // Frequency 2Hz
  while (1);
}
All it’s doing is to blink a LED with a frequency of 2Hz. Compile it clicking on the “✓” icon on the bottom left corner. Hopefully you should get a success message from the terminal and see that the program is occupying just 66 bytes.
3. Adjust the environment configuration file
By default, Platformio uses an avrdude flag -D that prevents the flash to be wiped out before adding new code. This is from the avrdude documentation:
-D
Disable auto erase for flash. When the -U option with flash memory is specified, avrdude
will perform a chip erase before starting any of the programming operations, since it
generally is a mistake to program the flash without performing an erase first. This
option disables that [...]
Platformio has different ways to upload the program that you can select from the icon Run Task on the bottom left corner. Two of these are Program and Upload. Apparently if you select the Program task then the -D flag is not added and the entire memory is erased. However, if you want to use the Upload button Platformio will run the Upload task without erasing the memory. In this case when avrdude is verifying if the code has been uploaded correctly it will give an error because part of the old program memory is still there. We want to still use the button (to my knowledge there is no way to wire the Upload Icon to Program task) so we need to add this line in the platformio.ini file under the ATtiny10 environment
[env:attiny10]
platform = atmelavr
board = attiny5
upload_flags = -e   ;This is the line to be added
4. Upload
Now we have a HEX file ready to be uploaded into the chip. We will program the ATtiny10 flash using a USBASP programmer that can be bought from eBay or other Chinese shops for a couple of euros. It’s very likely that the USBASP you bought doesn’t support the TPI protocol needed to program the ATtiny10. You need to update to the latest firmware made available on the 2011 (even if you bought the device in 2019) If you don’t do so there is no way you can get the micro programmed and you will get this error message:
avrdude: error: program enable: target doesn't answer. 1
avrdude: initialization failed, rc=-1
         Double check connections and try again, or use -F to override this check.
To update the firmware you can refer to this simple process: you just need another USBASP or Arduino, some jumpers and 10 minutes of time. Also note that to program the Non Volatile Memory (NVM, flash memory) you must apply 5V between VCC and GND. From the ATtiny10 datasheet:
NVM can be programmed at 5V, only. In some designs it may be necessary to protect
components that can not tolerate 5V with, for example, series resistors
The USBASP has the option to provide 3.3V or 5V. To select the right voltage you need to change the jumper provided in most of USBASP clones.
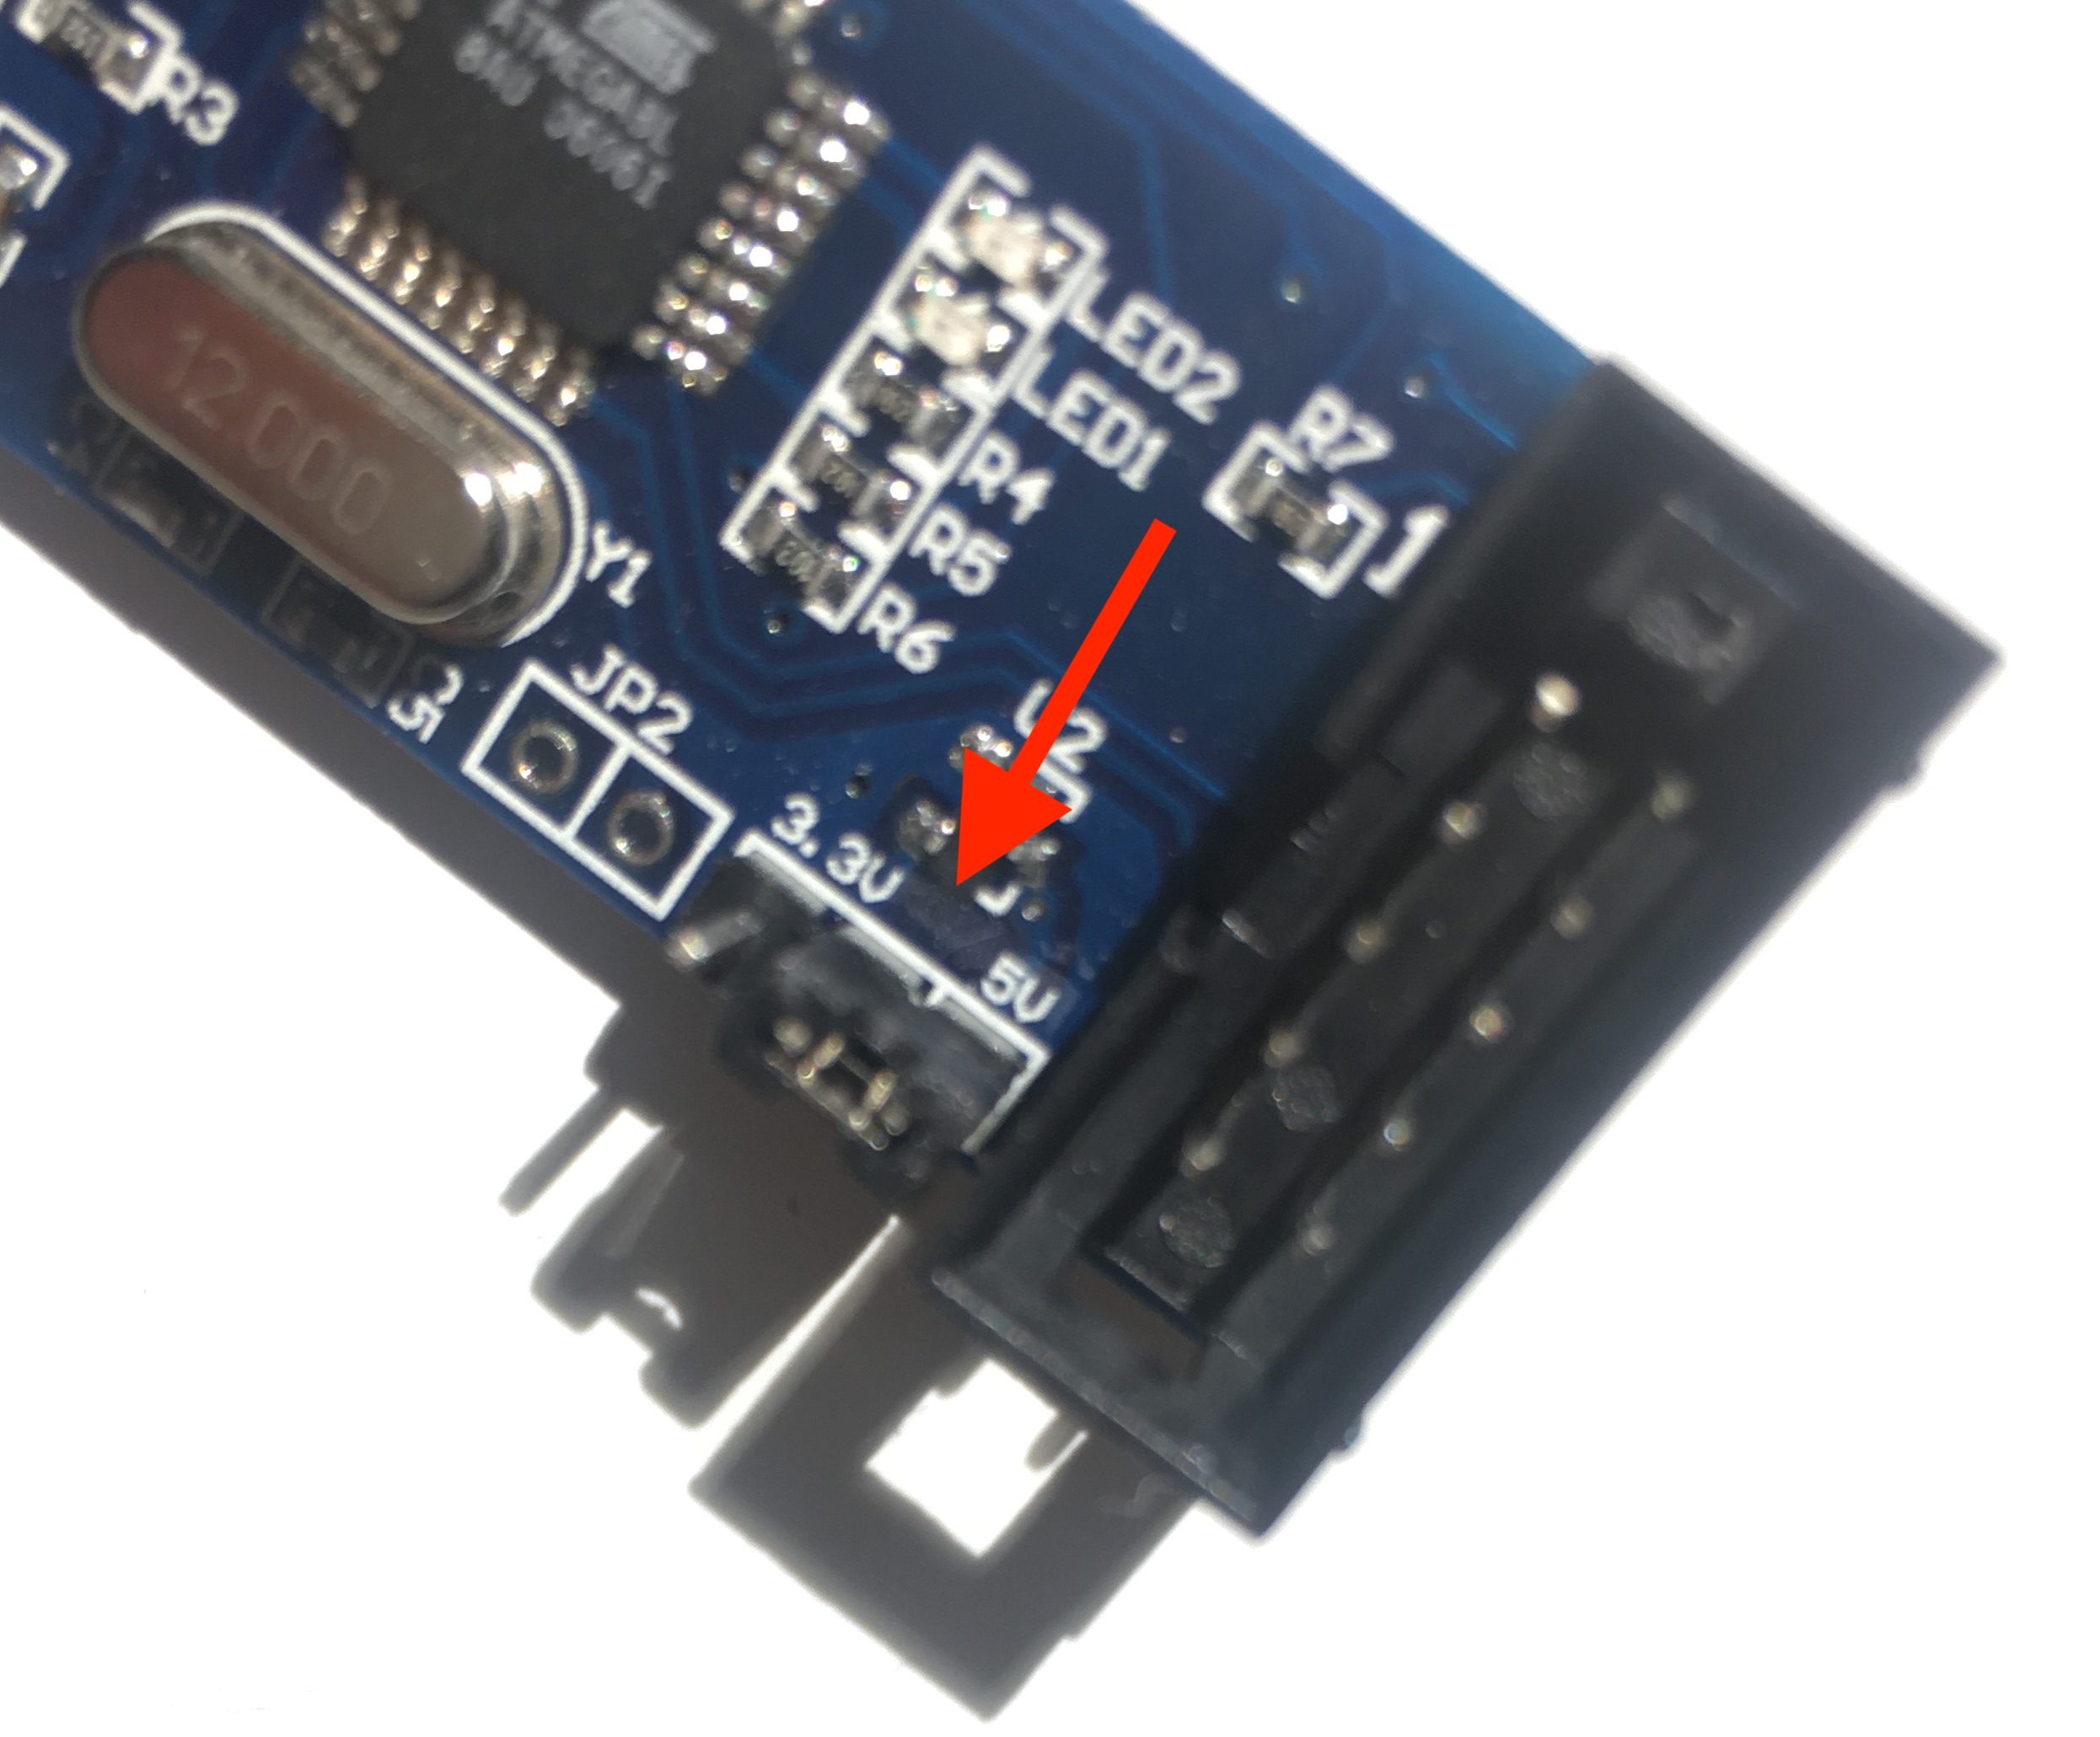 - You need to provide 5V to program the flash memory -
Once the programmer has got a new shiny firmware and 5V are properly provided you can upload the program on the ATtiny just pressing the upload button on the bottom left corner of the IDE. Now go to the last part of the tutorial to see if everything has worked out correctly.
The terminal way
1. Do some code
Take the code of step 3 above (or any other code but make sure to link the relevant libraries) and put it in a file called main.c. Save and close.
2. Compile the code
Now it’s time to transform the C code in a HEX file that the ATtiny can use. We can do so with the avr-gcc compiler.
Where you get it? On the web, surely. However, if you have Arduino installed, you already have the computer in the Arduino directory and more precisely:
"YOUR ARDUINO FOLDER"/Contents/Java/hardware/tools/avr/bin
To call avr-gcc program you have three options. First one you copy all the path and paste on the terminal to execute the program. The second option is to add avr-gcc to the system PATH. Third, you can copy the avr-gcc file in the same folder of your code and you can execute it just typing ./avr-gcc. I will show the commands below assuming this third option because it’s the easiest to show.
First thing to do is to link the code in a blink.o file. These are options that will be used:
- Os: defines the optimization;
- DF_CPU: defines the clock speed in the micro-controller;
- mmcu: is needed to generate code for a specific device.
- c: compiling command followed by the name of the file
All together:
./avr-gcc -Os -DF_CPU=1000000 -mmcu=attiny10 -c main.c
Now you should see a file called main.o inside the folder.
Similarly, we create a .elf file and the .hex file:
./avr-gcc -DF_CPU=1000000 -mmcu=attiny10 -o main.elf main.o
./avr-objcopy -O ihex main.elf main.hex
In the folder, you should see the main.hex file ready to be uploaded.
All this process is usually defined into a makefile so that it can be executed all at once just calling the makefile with Make command.
You can also skip this part and get the HEX file compiled by Platformio ready to be uploaded in the next step (but once you have Platformio in place then you can just upload it from there!)
3. Upload the code
The last step is to upload the code and the way we are going to use avrdude and the programmer USBASP. As described above, the USBASP has to have an up-to-date firmware and you need to provide 5V to program the flash memory. Again you can find avrdude on the web or find it in the Arduino folder. The avrdude executable will be at the following location:
"ARDUINO FOLDER"/Java/hardware/tools/avr/bin/
We will also need a configuration file avrdude.conf that can be found here:
"ARDUINO FOLDER"/Java/hardware/tools/avr/etc/
After copying the files inside the same folder of the .hex file you can upload the code with this command:
./avrdude -C ./avrdude.conf -p t10 -c usbasp -U flash:w:main.hex
Hello Blink
Whatever the path you choose, the last thing to do is to check the ATtiny10 is working as expected. Just follow the schematic below for the wiring.
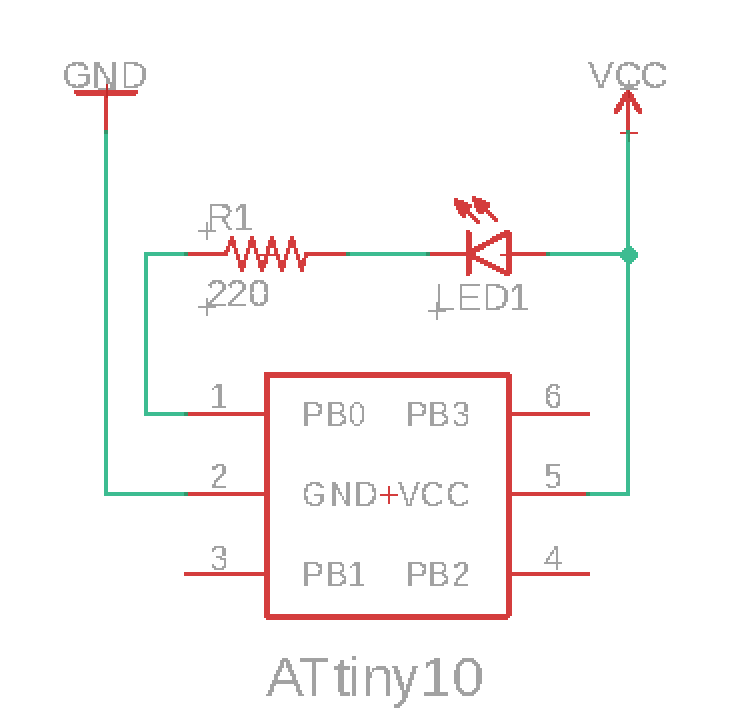 ATtiny10 blink circuit
Other posts you may be interested in
- Tiny videogame for the ATtiny10
- OLED Display driven by ATtiny10
- Technoblogy shows how to program the ATtiny10 with an Arduino and a lot of other interesting stuff.